Continuous drainage path
Install the Roof De-icing Heating Cable
Create a continuous heated path from the roof edge through gutters and downspouts before winter weather arrives.
Package includes
- 1 × Roof De-icing Heating Cable
- Roof Clips (quantity per specifications)
- 1 × User Manual
Supply separately: Nails or screws with roof sealant, or a roof-rated adhesive suitable for your approved surface. Flat-nose pliers are required.
Before you begin
Approved application: Inclined roofs with asphalt shingles and metal/plastic gutters only. Not for wood, rubber, slate, metal, low-slope, or flat roofs.
- Install only when the roof is dry and clear of snow and ice, at 32°F–80°F (0°C–27°C).
- This is a fixed-wattage cable. Do not cut, shorten, or modify it. Never let the cable cross, overlap, or touch itself.
- Use only with a grounded, GFCI-protected 120V outlet. Have a qualified electrician install one if needed.
- Plan the full layout before fixing any clip.
Installation
Six steps to a continuous drainage path
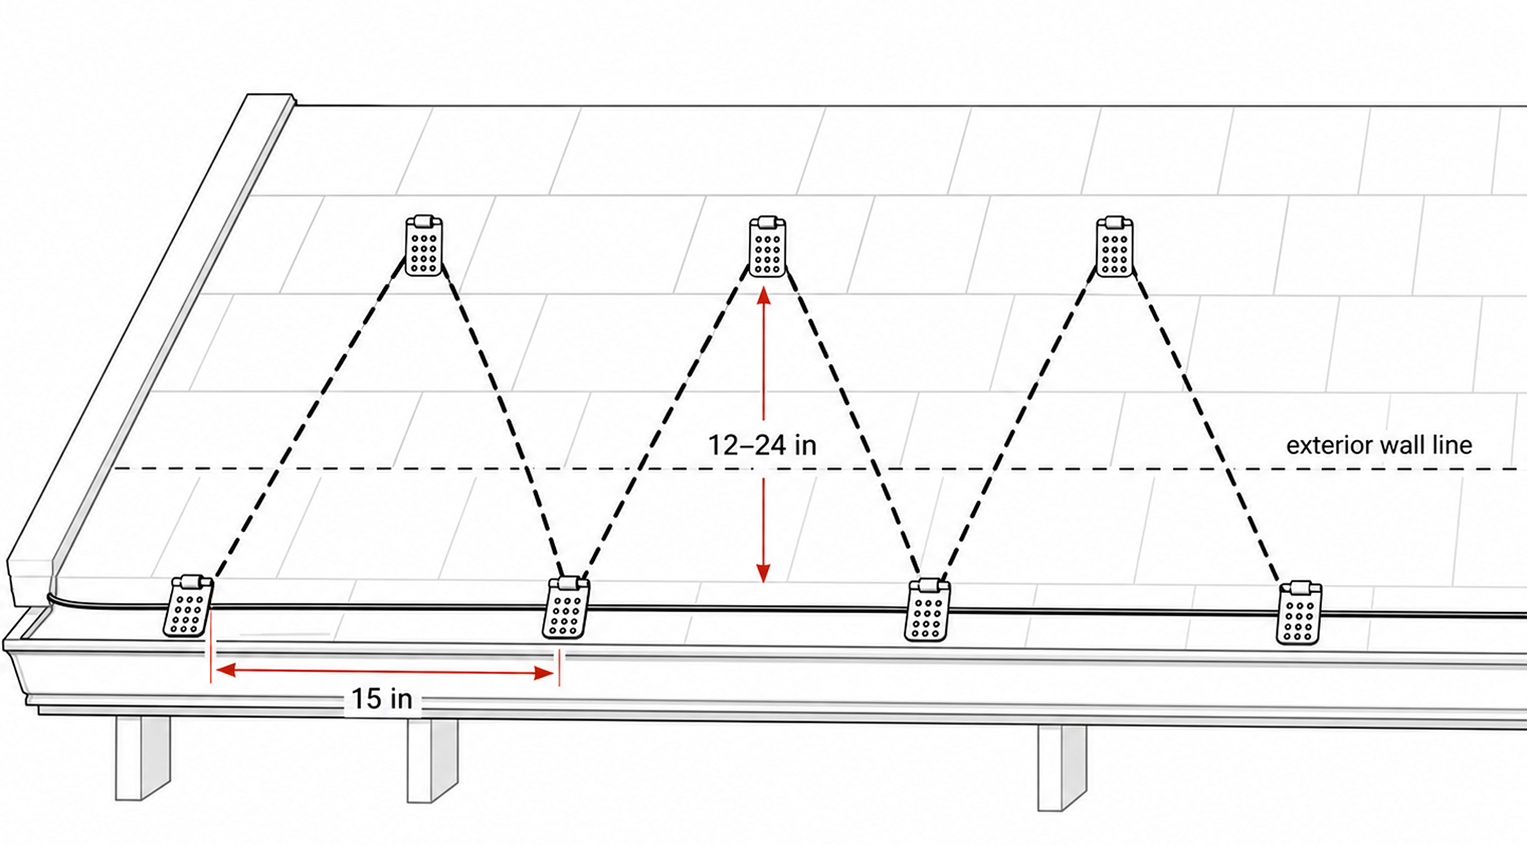
Plan the zigzag layout
Mark a triangle pattern along the roof edge. Make each triangle about 15 in (38 cm) wide, and run the peaks far enough up the roof to pass the exterior wall line below—usually 12–24 in (30–60 cm) from the edge—so the warmed path covers the cold overhang. Keep all peaks at the same height.
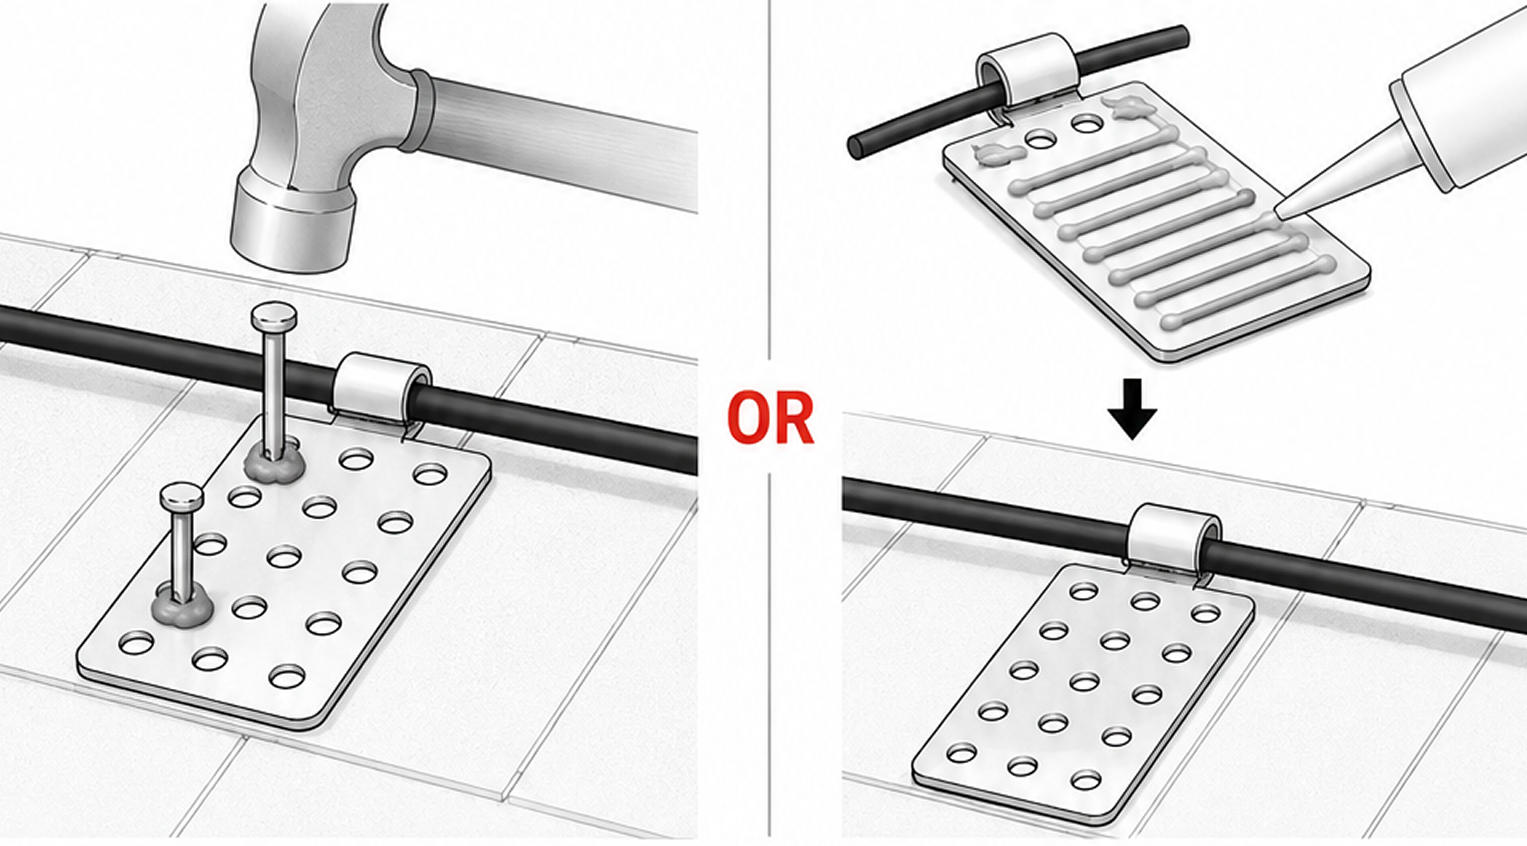
Choose how to fix the clips
Inclined asphalt-shingle roof: Nail or screw the clip through its holes into the roof, then seal every hole with roof sealant to keep it watertight.
Metal/plastic gutter—no penetration: Bond the clip with a roof-rated outdoor adhesive. Press firmly and let it fully cure before loading the cable.
Do not install the cable on wood, rubber, slate, metal, low-slope, or flat roof surfaces.
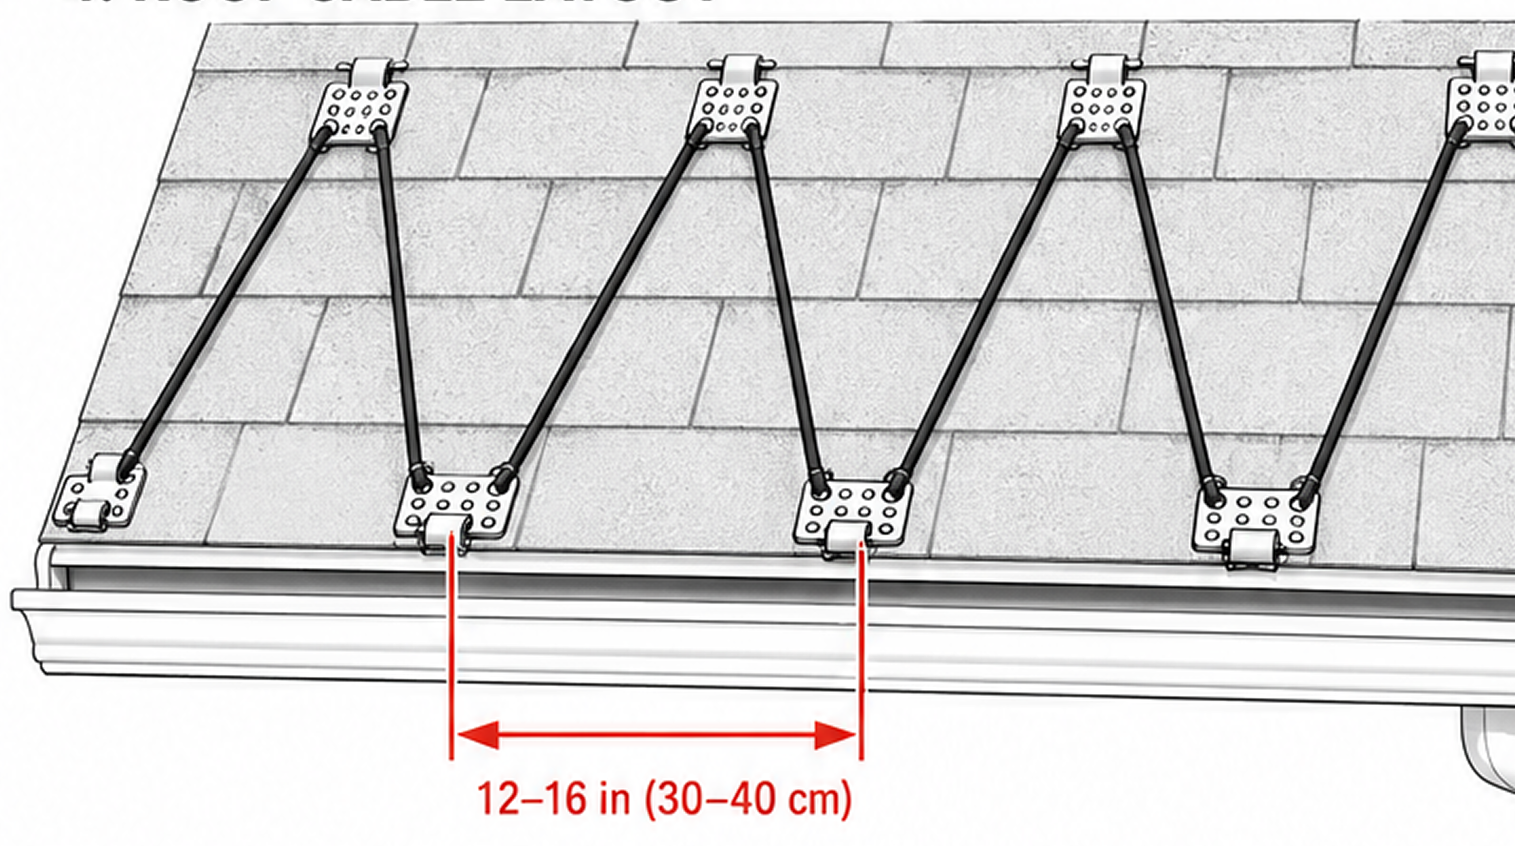
Secure the clips
Fix a clip at each peak and base of the pattern and along straight runs, about every 12–16 in (30–40 cm). Make sure each plate sits flat and tight against the surface.
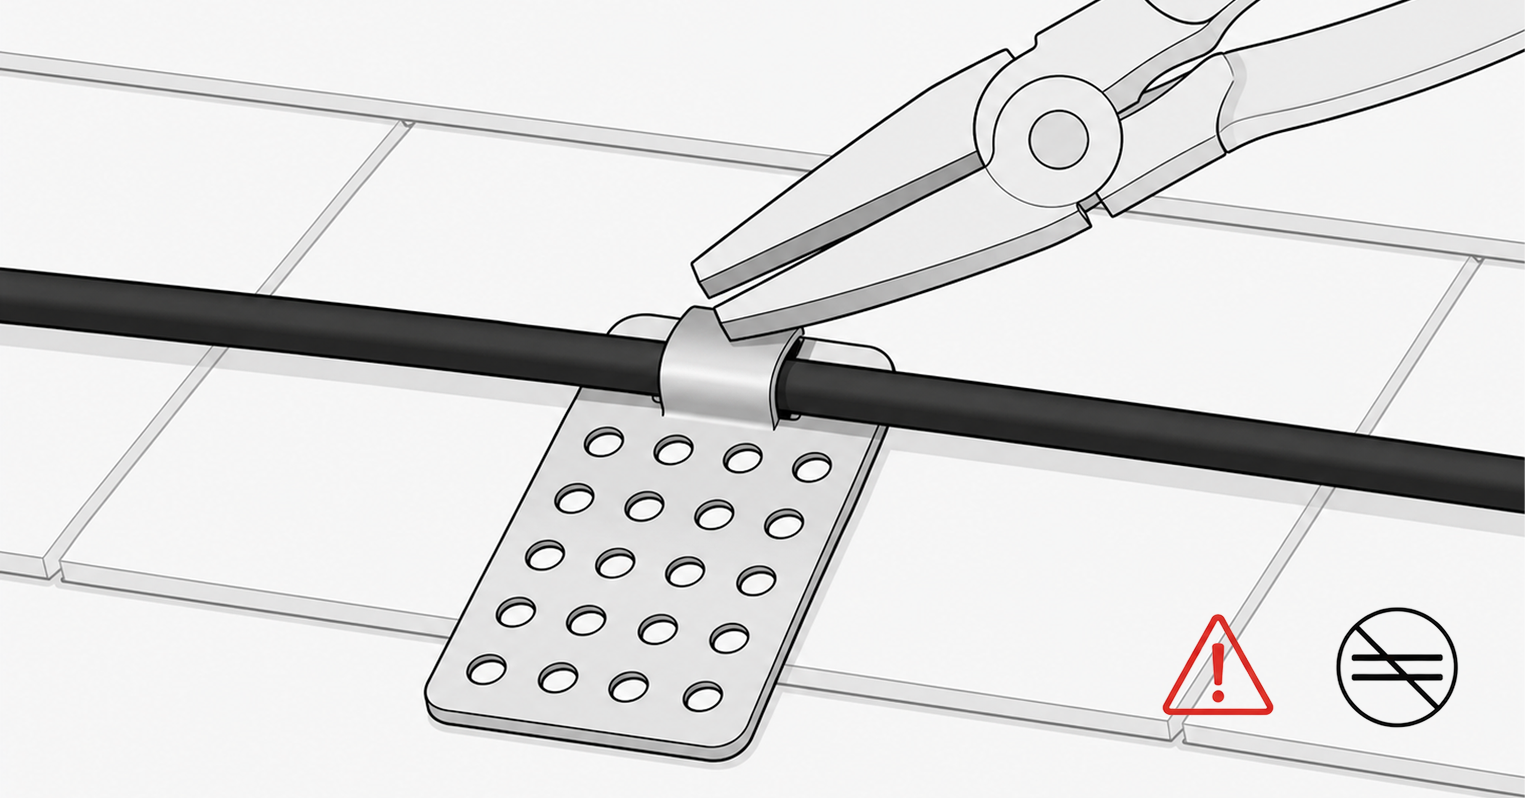
Load and clamp the cable
Lay the cable into each clip’s channel, then squeeze the clamp shut over the cable with flat-nose pliers so it holds firmly. Do not over-squeeze—it can crush or cut the jacket. Keep the cable straight; never overlap or cross it.
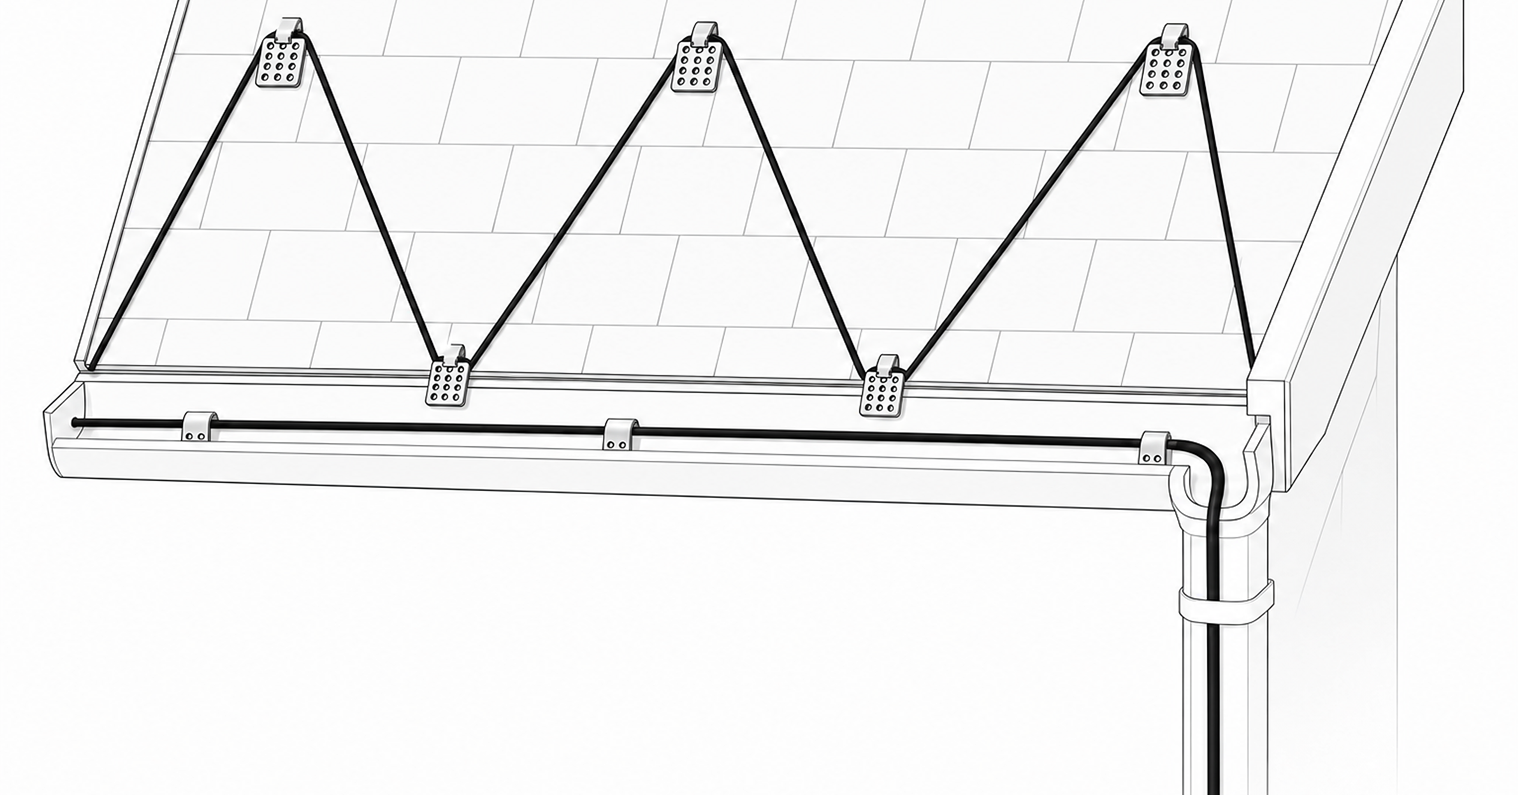
Run into the gutter and downspout
At the edge, form a small drip loop, then lay a single run of cable along the gutter and down to the bottom of the downspout, leaving a few inches at the outlet. Do not coil, double back, or overlap the cable. Use a clip to secure it at the gutter lip or downspout mouth if needed.
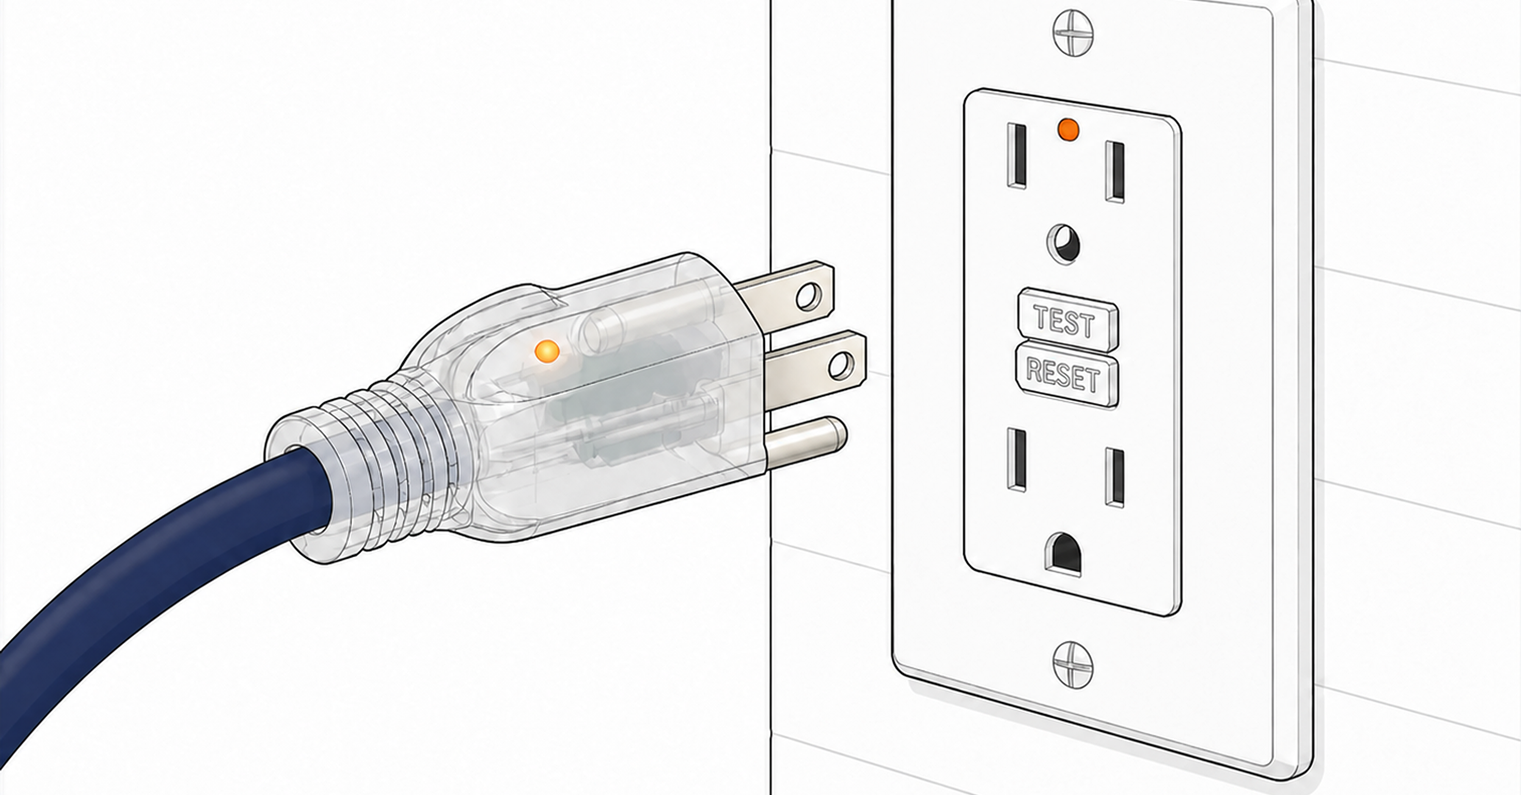
Connect power
Plug into a grounded, GFCI-protected 120V outlet within reach of the starting point. An outlet with an on/off switch and indicator light is recommended. Confirm the cable is not cut, pinched, or overlapped before energizing.